Git workflow
This document describes the best practices when working with Capact repositories.
General rules
Each contributor and maintainer must follow this workflow:
- Work on forked repositories.
- Create branches on the fork and avoid working directly on the
mainbranch.
Prepare the fork
A fork is a copy of the repository from which you raise pull requests to propose changes to the original repository. The contribution workflow that bases on forks allows both the members of the Capact.io organization, and the external contributors to contribute code and content through the same process. This keeps the main repositories clean as contributors create branches only on the forked repositories.
To create the fork, click Fork button in the upper-right corner of the repository's main page.
Configure the fork
NOTE: The document refers to the original repository as the upstream repository and to the forked repository as the origin repository.
To make it easy to synchronize the changes from the upstream repository, configure a new Git remote and set the synchronization of the main branch to the new remote.
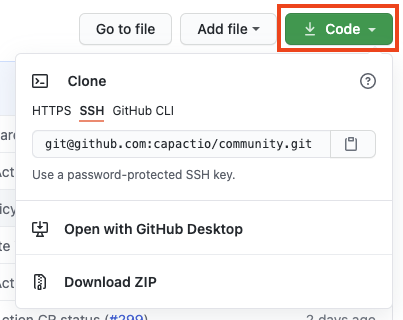
Clone the fork to your local machine. Use the Code button on the repository's main page to view the command to use.

Navigate to the location of the cloned repository.
To see the current configured remote repositories, run the following command:
git remote -vThe result has the following format:
origin  https://github.com/{your-username}/{repository}.git (fetch)
origin  https://github.com/{your-username}/{repository}.git (push)
Specify a new remote upstream repository to synchronize with the fork:
git remote add upstream https://github.com/{original-owner}/{original-repository}.gitFor example:
git remote add upstream https://github.com/capactio/community.gitDisable pushing changes directly to the upstream:
git remote set-url --push upstream no_pushFetch all remote branches:
git fetch --allSet the local
mainbranch to track the remotemainbranch from the upstream repository:git branch -u upstream/main main
From now on, every time you pull the changes from main branch on the local repository, you refer to the main branch of the upstream repository.
Contribute
Basic flow
After you set up your fork, start contributing. Follow these steps:
Check out the
mainbranch.git checkout mainPull the latest changes:
git pullCreate a new branch:
git checkout -b {branch-name}Change proper files according to what you want to contribute.
Select changes to commit. To include all changes you made within the repository, use:
git add -ACommit changes:
git commit -m "{your message}"Push changes to the origin repository:
git push -u origin {branch-name}Open a pull request from GitHub UI or CLI.
- For the pull request title, use the following rules:
- Include a short description of changes made.
- Use the imperative mood.
- Capitalize it.
- Do not end the subject line with a period.
- For the pull request description, adhere to the pull request template.
- For the pull request title, use the following rules:
Keep branch up to date
To keep the branch up to date, execute the set of following commands:
# Update the main branch by pulling all changes
git pull upstream main:main
# Reapply your commits one by one on the top of the main branch
git rebase main
In case of any conflicts during the rebase, run:
git rebase --abort
Follow the Rewriting history chapter from the "Pro Git" book to squash your commits into one.
Retry the rebase, resolve all conflicts and continue the rebase with the command:
git rebase --continue